Communication is particularly important when navigating through the hazards found in canyons, and can often be challenged by the environment. Roaring water makes it hard to hear each other and large drops or waterfalls can obscure line-of-sight. Whistle signals and hand signals are often used when descending canyons.
There are no universally agreed upon standards for whistle signals or hand signals, so it's important to make sure your group is on the same page before heading out - especially if you are venturing into more technical or aquatic canyons. This page presents one set of standards that have been used by UNSW outdoor club members.
Whistle Signals
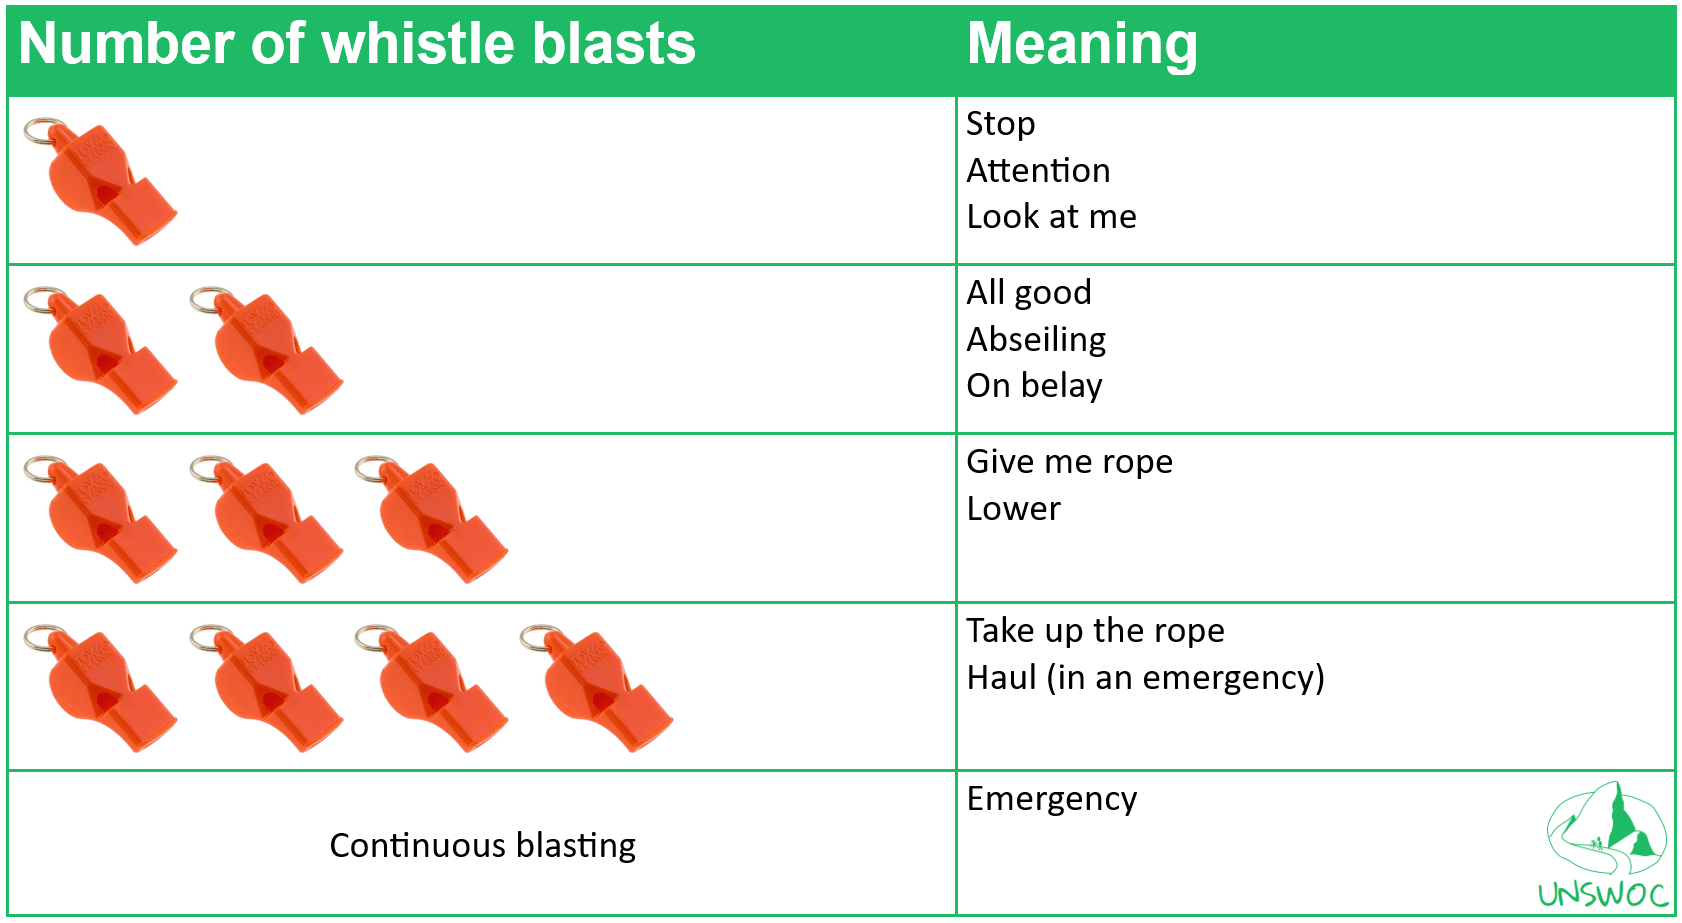
UNSWOC trip leaders must carry a whistle with them on club canyoning trips, and it is strongly recommended that you take a whistle on private trips. The table below outlines the whistle signals that we typically use. When using your whistle make sure to leave a one second pause between blasts, this helps keep the communication clear as sounds can bounce around and get muddled in canyons. If you are unsure about a communication, repeat the number of whistle blasts that you heard and wait for your partner to confirm by repeating back again, or tell you to stop (one blast). The three and four blasts can be confusing, a good way to remember the order is the phrase "Give before you take", the number three (give) comes before the number four (take).
Your whistle should be easily accessible while on rope, and retrievable with one hand while your other is holding the brake strand. Whistles are typically attached to your helmet, I personally use a retractable key lanyard (can get at bunnings) to keep the whistle out of the way when not in use.
Whistles become especially useful in whitewater scenarios, where every party member should have a whistle and know how to communicate with it. In this scenario, five whistle blasts can also be used to call for a guided rappel when there is a gnarly aquatic hazard at the base of an abseil.
Hand signals
Hand signals can provide more detail than whistles, but rely on line-of-sight. These signals also vary a lot more group to group so again make sure to establish what each one means before heading out.
OK/Confirm
This is one of the most basic hand signs, used to confirm a communication or confirm that you are OK. Typical uses include: when surfacing after a jump, when off rope after an abseil (if the anchor manager is looking at you) or confirming you are OK after a slip/fall. Combining this with a point can be used to check in on someone (are you ok?) or to indicate something positive, i.e. go here, this way is best/safe.
NO! Hazard!
This other basic sign means no! This is typically used as a response to a question (e.g. a depth check for a jump) or to indicate a hazard. This sign can also be combined with a point to indicate the location of hazards.
Lower/raise the rope

These two signs can be used to adjust rope length, especially useful when you are abseiling into a pool or are short on rope. Setting the rope length just right also allows the twists to escape the rope. A hand spiraling downwards means lower, and a hand spiraling upwards means raise the rope. You can also indicate how many meters with your fingers.
Release!
This is used to tell the anchor manager that something bad has happened to the abseiler and that they need to immediately use their releasable anchor to lower the abseiler. Basically the same as 'lower' but with more emphasis.
Sharp rock, bleed the rope!
This sign is used to tell warn the anchor manager about sharp rock or a sharp edge, and advise them to bleed the rope.
Slippery rock
This is used to warn others of slippery rocks. This sign is typically done on the leg to distinguish it from 'sharp', which is done on the arm.
Depth check - call and response
This set of signs is used to ask for a depth check in a pool of water. The first sign is used to ask your partner to perform a depth check. The person at the bottom should thoroughly check the pool and then indicate the depth by marking it on their body (e.g. shoulder height here). Any hazards or good landing spots should be identified with the 'point OK' sign or the 'point hazard' sign.
Bag
This exact meaning of this sign depends on context, but it generally means send me a bag. This could be used because the abseil is challenging and should be performed without a bag, or if equipment contained inside a bag is required, e.g. send me my lunch and raincoat!
Rope
This sign is used to indicate rope, and is typically used to ask for rope to be sent to you.
Leader

This sign is used to ask for a trip leader or someone experienced to come and help, typically used if there is a challenging situation or difficult decision.